Wednesday, 24 December, 2025г.


Где искать: по сайтам Запорожской области, статьи, видео ролики
пример: покупка автомобиля в Запорожье
Roland TR-8 tips - Creating Tracks
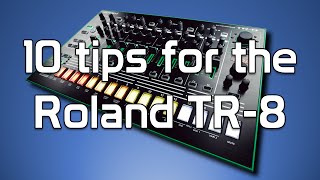
10 tips for the Roland TR-8
If you’re lucky enough to own a TR-8 then you’ll be pleased to know that we’ve pulled together a list of 10 tips to help you get even more out this outstanding drum machine.
So let's dive right in.
1.Change of colours
The TR-8 really stands out in a darkened nightclub thanks to its brightly lit controls – did you know that there are other colour schemes you can select for it though ?
Start by switching it on whilst holding down the PTN SELECT button.
Once it starts up, hold down the DEPTH button and you’ll see the Scatter dial light up. To change a scheme keep holding down DEPTH and move the SCATTER dial – you can pick between 1 to 6 for differing light schemes. Just hit START to carry on once you're done.
2. Use all 4 outputs
The TR-8 has 4 analogue outputs, the two mix outputs and the 2 assignable outputs which you can quickly set to 4 separate outputs.
Firstly fire up the TR-8 but hold down PTN SELECT at the same time. each drum sound will route to the MIX OUT as a default, but if you hold down A or B and then your chosen sound’s select button you can assign that sound to ASSIGNABLE A or B.
Next you can then hard pan your sound left or right, by holding down the inst select button and twisting the TEMPO dial left or right.
3. Chain up your patterns
put the TR-8 into PTN SELECT then press and hold the start pattern. Then press the end pattern. Now the patterns will play out in sequence
4. Grab 2 new drum machines !
if you haven’t already grab the 7×7 pack – this contains the TR-707 and TR-727 sounds. More juice, we like.
5. Pan away
You can quickly hard pan a drum sound left or right, by holding down the its instrument select button and twisting the TEMPO dial left or right.
6. Effects
The effects in the TR-8 don’t get routed out to individual channels but get outputted on the full mix. You can then output sounds using individual channels and keep the full mix for an FX SEND.
Make sure you set Reverb and / or the Delay to 100% and then control the FX using the master volume dial.
7. Configuration of the outputs in your DAW
Wire up your TR-8 to your computer across USB and you can then utilise 14 channels of audio (in mono). 1-2 will be your full mix & effects, 3 is Bass Drum, 4 is Snare, 5 – Low tom,
6, Mid Tom, 7 is High Tom, 8 is Rim Shot, 9 – hand clap,10 closed hat, 11- Open hat, 12 – Crash Cymbal, 13 – Ride Cymbal, 14 – Is the External In
8. DJing and Syncing
Part of the great fun to be had with a TR-8 is syncing it up to Traktor or a Kontrol deck.
To easily do this, fire up Traktor’s Controller Manager under the Preferences option
You do need to add a GENERIC MIDI device under DEVICE and then ADD
Once you’ve done that, set the out port to the Kontrol and then turn on the midi clock in Traktor (click Send Midi Clock)
Then you’re off and running !
9. Sync again
If your using your TR-8 playing alongside with other midi gear and need to reset its SYNC – hold down the TAP button and press START / STOP
10. Everything to gain
You can set the gains for each sound from -24 dB right up to + 24dB. Hit the KIT button then hold down the instrument button you want to change and use the TEMPO dial to select your required gain.
http://creatingtracks.com/10-tips-for-your-tr-8/
Теги:
Roland TR8 Roland-TR8 Aira Roland Aira TR-8 Roland tips tricks tips tricks tr-8 drum drums machine set drum set music electronic trance dance techno drum machine TR8 TR8 tips tips for tr8 tips for TR-8 tips for roland tr8 tips for roland TR-8 Roland Aira Aira TR8 Aira TR-8 Roland TR-8 Roland Aira TR8 TR8 tutorial TR-8 tutorial how to sync TR-8 how to sync TR8 Roland Tr-808 Roland TR-909 Roland TR-707 Roland TR-727 Roland 808 Roland 909 808 909
Похожие видео
Мой аккаунт


 У вашего броузера проблема в совместимости с HTML5


