
Monday, 12 January, 2026г.


Где искать: по сайтам Запорожской области, статьи, видео ролики
пример: покупка автомобиля в Запорожье
Remove Activate Windows 10 Watermark Permanently - Go to Settings RegEdit
 У вашего броузера проблема в совместимости с HTML5
Remove Activate Windows 10 Watermark Permanently - 100% Working Fix
Go to Settings to Activate Windows. Remove this message Permanently.
Beautify your Windows with WallWave [ Download https://wallwave.hows.tech : We Recommend ]
After Watching the fix in the video
Follow this guide to completely activate windows 10 and unlock all features.
https://www.hows.tech/2017/04/how-to-activate-windows-10-without-product-key.html
Are you getting “Activate Windows 10 – Go to settings to activate windows” watermark on your windows desktop? Looking for the way to remove activate windows 10 watermark from your desktop? Nothing to be worried here is a simple and easy method to remove activate windows 10 watermark. Here the solution for you.
The common reason for Activate Windows 10 watermark is your windows license has expired. If you have a genuine product key then you can activate it directly.
Also, you can use some third party software to activate windows you can do it, but there are a lot of chances to get the watermark again. So if you want to remove Activate Windows watermark, Here follow the below steps.
Trick To Remove Activate Windows 10 Watermark 2020
You can remove Activate Windows Watermark with a simple notepad trick. Let’s follow the below steps :
First open Notepad, You can do this by click on start menu search type notepad and hit the enter key. Now on notepad type below commands :
@echo off
taskkill /F /IM explorer.exe
explorer.exe
exit
Tricks To Remove Activate Windows 10 Watermark
Now on notepad go to file and click “Save as”. Here Change the save as type to All Files (*.*) and Give the file name as “ remove.bat”
remove activate windows 10 watermark permanently 2020
save bat file
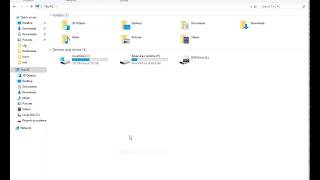
Now open the file location where you saved. You will see a file as shown below image.
remove the activate windows 10 watermark
Now simply select and right click on the remvoe.bat file and click on run as administrator. you will see a command prompt will open and closed itself. That’s it now simply restart window computer. And you will notice Activate Windows 10 watermark will be removed from your desktop.
Remove a Windows Watermark With Regedit
Here another tweak to remove activate windows 10 watermark from the registry editor. Here how to do
Press Windows + R, type RegEdit and ok to open the windows registry editor.
First backup registry database then navigate to the following key.
“HKEY_CURRENT_USER” Expand “Control Panel.” Click on the “Desktop” folder.
Now on it in the right-hand window, Double click on “PaintDesktopVersion” DWORD key.
And Change the “1” to a “0” in the “Value Data” field, and click “OK.”
That’s all, Close registry editor, and restart windows to take effect the changes.
#activate #windows #watermark
Disclaimer: This tutorial is for educational purpose only. This can help you in taking screenshots or recording screens without any watermark barrier.
Теги:
Activate Windows 10 Watermark Go to Settings to Activate Windows activate windows Go to Settings to Activate Windows remove activate windows 10 watermark remove activate windows 10 watermark permanently regedit remove activate windows watermark regedit windows 10 activate windows activate windows watermark Remove Activate Windows 10 Watermark windows product key 2020
Похожие видео


Мой аккаунт