
Friday, 16 January, 2026г.


Где искать: по сайтам Запорожской области, статьи, видео ролики
пример: покупка автомобиля в Запорожье
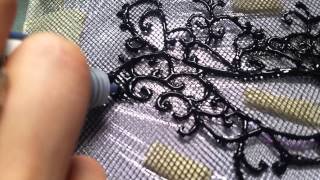
Quick and Easy - Mask Making With Feathers
 У вашего броузера проблема в совместимости с HTML5
Go from ordinary.... to fabulous!
Take that simple old mask and get creative! Turn it into something wonderful with feathers -- for Halloween, Mardi Gras, or just that masked ball you have on your calendar.
You'll need:
- A basic plastic mask (or make one out of cardboard or fabric yourself)
- A nice selection of feathers, either all one color or a variety of sizes and types - the more you have the more creative you can be. Naturally molted parrot feathers were used here and for the larger mask, store-bought chicken feathers were used.
- A quick drying, clear flexible fabric glue
- Small pieces of felt or fleece, preferably in a neutral color like brown, black or white, about 12 X 12" square
- Sharp scissors & a permanent marker or pen
- Ribbon & beads, lightweight costume or old jewelry pieces
- Black elastic, thin fabric trim, & glitter optional
Gather your supplies. Try on the mask and check the eye holes to see if they are big enough. Many times they need to be enlarged. Mark mask where it needs to be trimmed. Cut as marked. If you plan to keep the mask or add weight to the mask, it would be a good idea to replace any thin elastic with a heavier version. Use the same hole on the mask and pull the elastic through, knotting the ends in the back of the mask.
If you plan on wearing the mask for a long time and for a more comfortable fit, trace the mask on top of a piece of fleece or felt to make a liner. Cut as marked. Mark and cut a slit where the nose fits mask. Make sure it fits and set it aside to glue it on last. Organize, lay out your feathers by type, size and color. Play with different designs by laying them on a piece of paper or material. If you're gluing the feathers on the front of a mask, arrange the feathers on the mask before you glue them. If you are gluing the feathers behind the mask, place your feathers on a flat surface and hold the mask in front of your arrangement to see how it might look when finished. Trim exposed shafts of the feathers, usually about half, to reduce bulkiness.
If you're attaching the feathers to the front of the mask, glue the larger feathers first. Glue the medium sized feathers next, working your way down to the smallest feathers, which are glued on last. It's best to layer and overlap the feathers to fill in any spaces as much as possible. Top your arrangement with a piece of costume jewelry or bauble to cover the feather ends. Having an arrangement on one side of the mask might need something on the other side to balance it out so it's not leaning in one direction all the time. Add beads or ribbon if you like and also be aware that the more you add, the heavier the mask will be.
To attach the feathers on the back of the mask, reverse the order and attach the smallest feathers first and work your way up to the larger feathers, which are attached last. You may want to turn your feathers over to help you remember to glue them face down. Begin gluing your feathers from the top center of the mask and work your way out to the side areas where the elastic meets the mask. Make any last minute adjustments to the arrangement before the glue dries. Next, add your fleece or felt cushion by gluing it on the back of the mask and press into place. Trim to fit if necessary.
For larger masks and masks that lie flat, remove the nose area of a plastic mask. Cut a circle or another shape from a sturdy material, like felt, burlap, or even cardboard and glue the front of the mask to the shape, in this case a circle. Be sure to remove a pie-shaped area for the nose and mouth and trim the eye areas on the material so you can see. Layer your feathers, always hiding the lower shafts of the feathers. Add fabric trim or glitter around the eye areas to accentuate and add more effect.
To smooth ruffled feathers, gently pull the feather between two fingers, with the grain, from the base to the tip, "zipping" the feather back together. Dampen lightly with water if necessary.
Of course this is only one of many ways to add feathers and create a mask - perhaps it will give you some ideas for your own project. Get creative and have fun!
"Songe D'Automne" music used with permission courtesy Latché Swing. Merci bien.
Go to www.latcheswing.fr or find them on Facebook at: www.facebook / latcheswing
For more information about Latché Swing and the Free Music Archive see: http://freemusicarchive.org/music/Latch_Swing/demo_2008/Songe_DAutomne. Other royalty-free audio courtesy IMSI Design. See www.IMSIdesign.com for more information.
Music and audio copyrights are the property of their respective owners or firms and are not associated with the video author, or video copyright in any way or form.
Disclaimer: Video and content provided as a public service. Not intended to be a substitute for any professional advice or service.
Video, content and photography © 2013 J.C. Gary. All rights reserved.
Теги:
masks art costume feather masks cosutme party ideas masquerade mask quick and easy mask costumes jc gary masques feather art crafts with feathers fancy dress party masquerade ball Mardi Gras (Recurring Event) mardi gras mask carnival máscara Maske maschera maszk ansiktsmaske masker theatrical arts costume design new year's eve party new years eve couture new year bon anne karneval carnaval carnivale Halloween (Holiday) magic SPÉCIAL BAL MASQUÉ PARIS 2018
Похожие видео


Мой аккаунт