
Wednesday, 14 January, 2026г.


Где искать: по сайтам Запорожской области, статьи, видео ролики
пример: покупка автомобиля в Запорожье
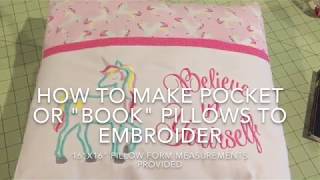
How To Sew A Pocket "Book" pillow with lined pocket - 16"x16" form (instructions below)
 У вашего броузера проблема в совместимости с HTML5
Instructions for how to sew a pocket pillow, reading pillow or book / storybook pillow for machine embroidery. For sewing machine and embroidery using a 16"x16" pillow form.
Instructions:
½ yard main fabric for pillow
1 fat quarter for outer pocket
1 fat quarter for pocket lining
Cut your main pillow fabric into 3 pieces:
One 16” x 16” square
Two 13” x 16” rectangles for envelope back
Cut your pocket front piece 10” x 16” – you will embroider this piece
Cut your pocket lining piece 11” x 16”
Written instructions to accompany video: https://www.youtube.com/watch?v=KsxZnXl2GcE
Press your fabric well. You may choose to add iron-on interfacing, stabilizer, fusible fleece and/or starch to your pocket front, depending on the density of the design and your fabric thickness.
Mark the pocket front for your embroidery design; I like to center it at least 1” higher than the actual center of the fabric so the design doesn’t end up too low on the pocket.
Hoop or float your pocket front and embroider your design.
Take one of your two envelope back pieces (13”x16”) to the ironing board. Fold a narrow hem (1/4”) on the 16” side and press, fold over again and press to cover your raw edge. Take this to the sewing machine and stitch this hem down.
Take the second of your envelope back piece to the sewing machine or serger, and finish the raw 16” edge with either a zigzag or overlock stitch. This piece will be inside the envelope and will not be seen. Set these two back pieces aside.
Once your embroidery is done on the pocket front, line up the top of pocket front piece with the pocket lining fabric, right sides together, on the 16” edge. The lining piece is 1” longer than the pocket front, with this longer piece hanging at the bottom of the pocket. Stitch a straight stitch across the top, sewing the lining to the pocket front with a ¼” seam allowance.
Flip the pocket wrong sides together, so the embroidery is facing out. Line up the bottom of the pocket front and the bottom of the pocket lining and press with your iron. This will give you a contrasting border at the top of your outer pocket, where the lining fabric will show. Stitch across this seam to secure.
Place the pocket on top of the pillow front with the lining side down, matching the bottom of the pocket with the bottom edge of the pillow front. Baste around 3 sides of the pocket to hold it in place, using a very narrow seam allowance.
Take the envelope back piece with the stitched edge, and place right sides together on top of the pillow front, aligning the 16”raw edge with the right side of the pillow front. Take the envelope back with the serged edge, lining up the 16” raw edge with the left side of the pillow, with the serged seam going vertically across the middle of the pillow- overlapping the other envelope back. Pin all the way around all 4 sides and serge or straight stitch around all 4 sides with a ¼” seam allowance. If you did a straight stitch, you may want to zigzag the seam allowance to prevent fraying.
Flip your pillow case right side out. Put an insert in and admire your work!
Instructions Copyright 2017 - Cara Sorella
Теги:
Machine embroidery sewing book pillow memories in thread brother embroidery machine brother pe770 brother nq1400e how to sew pocket pillow reading pillow personalized pillow book pocket pillow reading pocket pillows cara sorella storybook pillow story book pillow janome embroidery sewing machine
Похожие видео


Мой аккаунт