
Thursday, 01 January, 2026г.


Где искать: по сайтам Запорожской области, статьи, видео ролики
пример: покупка автомобиля в Запорожье
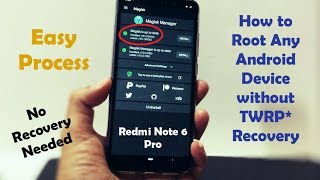
How to root Android using Magisk Manager & stock boot.img
 У вашего броузера проблема в совместимости с HTML5
Download links & Text format @ https://forum.hovatek.com/thread-21427.html
This video explains how to root an Android phone using Magisk Manager and boot.img
Boot.img can be obtained either from firmware or using WWR @ https://www.youtube.com/watch?v=pj4iFakq33M&t=614s
Drop a comment below if you have questions or reach out to us on the following platforms:
Website: https://www.hovatek.com
Facebook: https://www.facebook.com/hovatek
Twitter: https://twitter.com/hovatek
Google+ : https://plus.google.com/+Hovatek
00:09
In this video tutorial, I'll be explaining how to root an Android device using magisk
00:15
manager and a boot.img. Now you need to get the boot.img for your phone either
00:23
from the firmware which you downloaded online or from a rom which you backed up or
00:29
extracted from your phone. You can backup your phone using a variety of tools
00:34
depending on your chipset but anyway you either get the boot.img from the firmware or
00:39
extracted from your phone. Now, once you have your boot.img, you need to copy to your phone
00:44
storage because you're going to be working on that on the device. Now I have my
00:49
magisk installed and I'm also going to check my root status to show that
00:55
the phone is not rooted okay? so I'm starting from the very beginning, from
00:58
scratch. So you can see I do not have root access on this phone so I will be
01:02
rooting the phone using magisk and my boot.img. Now, its very important you get a
01:08
boot.img for your variant. You know, when it comes to Android, there are number of
01:12
variants so you just can't use any boot.img on your device. You need to get one
01:18
that is for your variant or close to your build number even for your build number
01:22
okay? So once you have that in place, you're going to launch magisk manager. On
01:31
this screen, you just select NO THANKS. Now, if you're using a Samsung device you might
01:37
want to change your settings. You come under Patch Boot Output
01:45
Format. Now, you'll want to change yours to .img.tar that is
01:49
for Samsung users who want to flash their patched boot.img using Odin
01:56
okay? but I want to use in .img format so I'll just leave it as it
02:00
is ok? Samsung users just take note of that
02:03
alright? So now at this screen, you're going to tap Install then you tap Install
02:11
again. Now you're going to select Patch Boot Image File.
02:20
Now, I'm going to locate my stock boot.img, I saved that to the Hovatek
02:27
folder on my internal storage. Okay, I have it here. I'm going to select it now so
02:39
I'm going to allow. So now you'll notice that magisk is going to download the
02:46
zip file and then begin patching alright? So I'll just wait a couple of seconds for
02:59
okay it's almost done, I think I can just slide off so you can see. So now what is
03:05
happening right now is that magisk is now patching the boot image which I just
03:10
loaded and then it's going to produce the patched boot.img for me, its
03:20
going to save it to the phone storage for me alright? So once that is done, I'll
03:25
just head over to flashing the patched boot.img to my device okay?
03:36
packing boot image.
03:45
You might be wondering why I have adb opened here. Its because I want to flash using fastboot. Alright!
03:51
so it says patched boot image is placed here so I'm
03:57
going to actually verify that by launching my file manager. Internal
04:08
storage. I'm looking for Magisk Manager. As you can see, I
04:15
have my patched boot.img, its 11.43 MB. So now, I'm going to copy
04:20
this file to my PC from which I'm going to flash. Now, at this
04:30
point, you now need to flash your boot.img .There's a lot of ways you
04:35
can flash your boot image depending on your kind of chipset and what you have. You might decide to
04:40
flash using a tool, maybe like Odin, SP Flash tool, Research Download tool, Miracle
04:45
box, depending on what you have at the moment or for most devices, you can
04:51
flash using fastboot. Now, I'm going to be demonstrating how to flash using fastboot
04:55
okay because that's quite general for devices
04:57
alright? So first off, I need to copy this patched boot image to my device
05:02
and that would take a couple of seconds so let me just do that quickly. Alright so I've
05:12
copied the patched boot.img to my adb folder and that is
05:20
what I have over here as you can see so now I'm going to be flashing this using
05:26
fastboot. Don't forget, you can flash your boot image using a variety of methods,
05:30
it depends on your chipset but I'm using
05:37
fastboot because that's actually quite general alright? So now, before you
05:42
can use fastboot on your device, you need to have unlocked your bootloader.
05:45
We have a guide on how to unlock your bootloader. Just check our forum, search
05:50
for how to unlock the bootloader of an Android device, we have a
Теги:
magisk magisk manager root android boot.img mediatek spreadtrum qualcomm root android with pc how to root android phone manually root android phone software 5.0 6.0 7.0 8.0 8.1 yt:cc=on how to install magisk 9.0
Похожие видео


![How to Use Magisk to HIDE Root for Snapchat, Android Pay, & Pokemon Go! [LATEST METHOD]](/images/mq/2/22/arP_ywkg08pApb.jpg)
Мой аккаунт