
Sunday, 11 January, 2026г.


Где искать: по сайтам Запорожской области, статьи, видео ролики
пример: покупка автомобиля в Запорожье
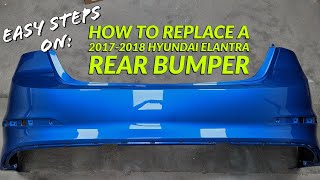
How to remove and install a 2017-2018 Hyundai Elantra rear bumper cover
 У вашего броузера проблема в совместимости с HTML5
We're going to show you how to install a rear bumper for a 2017 to 2018 Hyundai Elantra.
Where To Purchase: http://bit.ly/elantrabumpers
Learning how to install a rear bumper can look daunting but it is very simple process. Let us show you how with our in house marketer doing a bumper cover replacement for the first time.
Subscribe: https://www.youtube.com/c/Revemoto?sub_confirmation=1
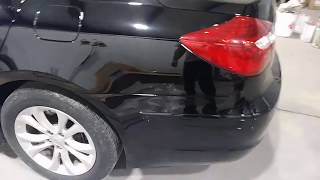
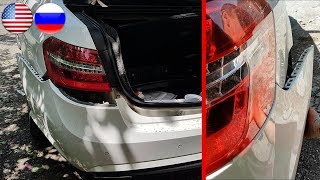
Our customer had her bumper knocked off in an accident and had to toss it out. We did not remove the bumper but she still had the clips and screws in place where the bumper was ripped off. If you are looking to learn how to remove a rear bumper cover, work your way form the end of the video to the beginning. In order to take off this rear bumper you do have to remove the tail lights as well. Very easy thing to do!
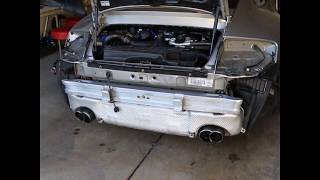
Under the tail lights are two plastic pins and one 10mm bolt. For the tail lights, there are two bolts and the electrical wire you have to disconnect. After you have removed, the tail lights, the bumper has a few bolts and plastic push pins. The large portion of screws and plastic push pins would be along the wheel well attaching the fender liner to the car. Once these are removed, there plastic clips should be exposed underneath the tail light.
We did not have to remove the rear bumper but if we did, there would be a small number of bolts holding the bottom of the bumper to the bottom frame of the car. Look underneath the rear bumper for those several bolts and, or plastic clips.
Source: https://www.revemoto.com
Follow Us on
FB: https://www.facebook.com/ReveMoto/
IG: https://www.instagram.com/revemoto/
Twitter: https://twitter.com/revemoto?lang=en
DISCLAIMER: While ReveMoto tries to make the information in this video as accurate as possible, we make no claims, promises, or guarantees about the accuracy, completeness or applicability of the content. No information contained in this video shall create any expressed or implied warranty or guarantee of any particular result. All do-it-yourself (DIY) projects entail some risk. It is the sole responsibility of the viewer to assume this risk. ReveMoto is not responsible or liable for any loss, damage (including, but not limited to, actual, consequential, or punitive), liability, claim, or any other injury or cause related to or resulting from any information posted in this video.
Теги:
how to remove a rear bumper on a hyundai elantra how to install a 2017 hyundai elantra rear bumper how to install a 2018 hyundai elantra rear bumper rear bumper how to install a hyundai elantra bumper rear bumper cover replacement rear bumper cover rear bumper replacement hyundai elantra 2017 how to install rear bumper cover bumper removal hyundai elantra hyundai elantra ReveMoto bumper repair النترا 2017 how to remove hyundai elantra tail lights DIY 2018 how To
Похожие видео

Мой аккаунт