
Tuesday, 13 January, 2026г.


Где искать: по сайтам Запорожской области, статьи, видео ролики
пример: покупка автомобиля в Запорожье
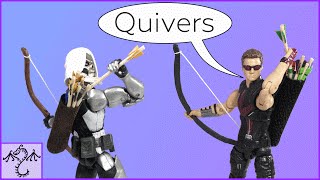
How to make a Quiver for your Action Figures or Other Toys
 У вашего броузера проблема в совместимости с HTML5
How to make a Quiver for your Action Figures or Other Toys
Today we’re going to make a quiver to store all those arrows we made last week. A quiver will be a great accessory for your Marvel Legends Hawkeye or Taskmaster or if you’re a DC fan, this will work for the Green Arrow too.
The materials you’ll need for this project are:
A stiff fabric. I’m using a poly-suede fabric I got from Hobby Lobby: http://www.hobbylobby.com/Fabric-Sewing/Apparel-Fabrics/Poly-Suede-Fabric/Black-Nubuck-Suede-Fabric/p/49122
Ruler or t-square (I got mine on Amazon at: http://amzn.to/2cDAfDL
Fabric marking pencil
Compass or small circular objects you can trace around
Low temperature glue gun
Glue sticks
Scissors
For the peg quiver, I’m using 18 gauge aluminum wire, pliers, and wire cutters
For the strap quiver I’m using super glue and 1mm by 2mm disc magnets that I got on ebay at:
http://rover.ebay.com/rover/1/711-53200-19255-0/1?icep_ff3=9&pub=5575209397&toolid=10001&campid=5337958261&customid=&icep_uq=rare+earth+magnets+1mm+x+2mm&icep_sellerId=&icep_ex_kw=&icep_sortBy=12&icep_catId=&icep_minPrice=&icep_maxPrice=&ipn=psmain&icep_vectorid=229466&kwid=902099&mtid=824&kw=lg
First I’m going to measure and cut out a rectangle 5.5 cm wide x 6.3 cm tall from my fabric to make the cylinder part of the quiver.
Next, we are going to make the bottom of the quiver. Use a compass and draw a circle with a radius of 1.2 cm. Then draw a smaller circle with a radius of .6 cm centered in the larger circle. Cut the fabric along the outermost circle. Then cut lines in the fabric from the outer edge of the circle to the inner circle. We’re making these cuts so that the outer edge of the circle can be folded up and be glued to the cylinder part of the quiver.
Apply a little bit of hot glue to the backside of the outer edge of your rectangle fabric along the shorter side that is 5.5 cm across. Quickly attach a flap or two from the outer edge of your circle piece. You want the good side of your circle’s flaps to be attached to the glue. Slowly make your way around the edge of the fabric and apply a bit of hot glue and attach a flap or two of the fabric at a time.
Now we have the base glued on, it is time to glue the side. If you are making a quiver that attaches with a strap, just apply a line of glue on the side of fabric making a cylinder to attach it to the other side.
Peg Quiver
If you are making a quiver that attaches with a peg, do not glue the side closed yet. Instead, measure and mark a point on the fabric that is forming a cylinder that is 2.3 cm from from the open top end of the quiver. Then cut a small notch from the fabric on your mark. This notch is where the peg will be inserted later.
Now we need to make the peg. Take a small piece of wire and bend it in half. Then pull both of the sides down to make a t-shape. Cut the top edges of the T so they are each about a half a cm long.
Use your low temperature glue gun to glue the side of your quiver shut until you reach that notch you cut in the fabric. Then glue in the t shaped peg into the notch so that the folded wire bottom of the t is facing out of the quiver. Then glue the remaining side of the quiver shut.
Apply some hot glue to the tip of your peg to make it thicker. After each layer of glue cools, test it on your figure to see if the peg is thick enough to stay in place. If you made your glue too thick and it won’t fit, use the side of the nozzle of your glue gun to melt some glue off.
Strap Quiver:
If you’d rather make the quiver with the strap instead of the peg, cut a strip of fabric that is about .5 cm wide. I cut my strip of fabric pretty long because I wasn’t sure how long it needed to be.
Glue one end the strip with the good side of the fabric down to the back of the quiver about ⅓ of the way down at about a 45 degree angle. Instead of gluing the other end of the strap to the figure, I’m going to use magnets to attach it so it will be super easy to remove the quiver. Attaching one magnet with super glue to the back of the quiver to the mark. Then I glue a second magnet to the strap and cut off any excess fabric from the strap.
Share Your Photos:
If you’ve tried any of my projects, I’d love to see your photos too! Just send me a link to your photos or send them to me on a social networking site.
Zubbie’s Social Media Info:
Facebook: https://www.facebook.com/ZubbieCreations/
Instagram: https://www.instagram.com/zubbiecreations/
Twitter: https://twitter.com/zubbiecreations
Tumblr: http://zubbiecreations.tumblr.com/
If you enjoyed this video, I would really appreciate it if you could please give it a like and share it with your friends with similar interests. Feel free to check out my other videos and subscribe if you want to stay updated for the new videos I post several times a week. Thanks for watching!
Music: Youtube Free Music "Eine Kleine Nachtmusik (by Mozart)"
Теги:
How to make action figure quiver how to make action figure prop how to make toy hawkeye quiver how to make marvel legends quiver how to make toy arrow holder how to make doll quiver do it yourself toy quiver diy action figure prop diy toy quiver how to make 1/12 scale quiver hawkeye quiver green arrow quiver taskmaster quiver toy quiver action figure quiver tutorial action figure crafting Zubbie Zubbie Creations Zubbiecreations marvel legends custom
Похожие видео


Мой аккаунт