
Sunday, 11 January, 2026г.


Где искать: по сайтам Запорожской области, статьи, видео ролики
пример: покупка автомобиля в Запорожье
How to Dye a Streak of Hair!
 У вашего броузера проблема в совместимости с HTML5
Thanks for watching, comment, like, & subscribe! (: We'd also love some requests! A makeup tutorial will hopefully be up soon! Also, we are planning a review on the bleach and dye used. Would you guys like OOTW's?
French Braid Updo: http://www.youtube.com/watch?v=3QdX_eGCyaA&feature=plcp
CAN'T HEAR/UNDERSTAND WHAT I'M SAYING?! When I uploaded this video, YouTube made the audio very hard to hear. I typed out basically what I said and here it is:
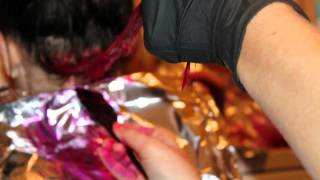
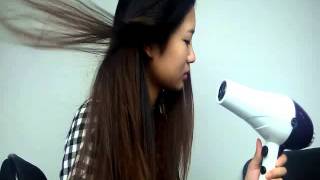
Okay, so first we bleached our hair so that the color would appear brighter and true to the color on the bottle that we wanted. This is what it looked like in Tally's hair after about 20 minutes or so. This is what it looked like in Tally's hair after 30. These next few pictures are of us goofing around while we waited for the bleach to finish lightening our hair. We left the bleach on for about 90 minutes total. We used the Beyond the Zone Radical Bleach Kit to bleach our hair. Okay, so at this point, we decided it was time to wash out the bleach. As you can see our hair is a pale yellow/blonde. The color looked like this. To wash it out, we used shampoo and conditioner, as instructed on the bleach kit. We first rinsed out our hair then we shampooed and conditioned it. Caitlin got a small rash on the back of her neck from the bleach, so we recommend that even though your hair is protected by the foil, to also wrap a paper towel around your neck just to protect your skin. We towel dried our hair before applying the color. We used Party Head Pink by Beyond the Zone. In this picture, Caitlin is beginning to apply the pink to Tally's hair. Tally's hair is almost completely saturated in color now. Her hair looked like this before wrapping it up in the foil. We recommend applying something to your skin to protect it from hair dye, which we didn't do. You can find things to protect it at Sally Beauty Supply, or almost anywhere else you can purchase hair dye, and it only costs a couple dollars. It's important to make sure you also get the baby hairs, because as you can see they are still blonde in this picture. By the way, we did end up coating those too after this picture. Okay, now Tally has begun dying Caitlin's hair. It is very important to lift up the hair to make sure the underneath is completely saturated with dye. Your hair should like Caitlin's in this picture right before wrapping it in foil. This is Caitlin's hair once wrapped. We did end up getting a bigger piece of foil to make sure to cover the dyed roots too. To make the color last longer and appear more vibrant, we applied heat by putting the hair dryer on the hottest setting and heating the hair through the foil. We kept switching off until it was time to rinse out the dye. The dye only needs to set for 20 minutes. We didn't get any pictures of us rinsing out our hair, because our photographer helped us. But basically you just rinse it until the water runs clear. Make sure to scrub your hands immediately afterward to get off as much dye as you can! And we finally are done! The girl on our left, Kristin, is our amazing friend that volunteered to come over and take pictures for us. These pictures just demonstrate the final product of our hair. This is what it looked like in a ponytail immediately after we dried it. And then we French braided Caitlin's hair up to see what it'd look like. To learn how to French braid up, we'll link the video down below. Thanks for watching, please comment, rate, and subscribe! XOXO, Caitlin and Tally.
Disclaimer: We are not affiliated with any brand, companies, or products mentioned. All opinions are our own. We cannot guarantee any results from following this or any other hair dying process. We were not paid by anyone for this video or opinions expressed.
Теги:
how dye streak hair pink section back dip dying Beauty Style Salon How-to (Conference Subject) Haircut heat dryer beyond the zone radical bleach kit party head
Похожие видео


Мой аккаунт