
Saturday, 17 January, 2026г.


Где искать: по сайтам Запорожской области, статьи, видео ролики
пример: покупка автомобиля в Запорожье
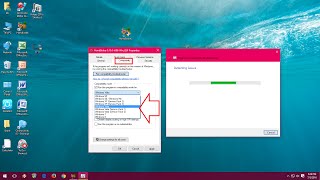
How To Change Compatibility Mode Settings in Windows 10
 У вашего броузера проблема в совместимости с HTML5
## How To Change Compatibility Mode Settings In Windows 10
Method 1:
### Manully changing compatibility settings
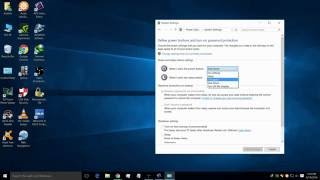
-- Right click on Program Shortcut or Exe file , after that click on properties. This will open properties Window which can be used to change Compatibility Settings for apps in Windows 10
#### Click on Compatibility tab to open compatibility settings
-- You can use compatibility tab for changing compatibility settings for current user, if you want to change compatibility for all users then use "Change settings for all users button"
-- This will allow you to run program in compatibility mode for older operating systems
-- This option can be used to reduce color mode
-- When you change DPI level of you text , it changes size of text, apps and other items to appear smaller or bigger depending on DPI level..
-- Programs with administrative rights can modify system files
-- This button can be used to apply same settings for all users.
-- You can use trial and error method for determining best settings for running your apps and programs.
Method 2:
#### Using compatibility troubleshooter
-- Right click on program shortcut or exe file, after that click on "Troubleshoot Compatibility", this will open compatibility troubleshooter which will guide you through different steps to fix compatiblity issues.
-- Compatibility troubleshooter will try to detect compatibility problems and will suggest you recommended settings
-- You can either use recommended settings to fix problems if it doesn't work then you can manually troubleshoot program using second option
-- Fill this form by clicking appropriate check boxes for fixing compatibility issues, after that click on Next button
-- Click on test your program to see if program works properly
-- After testing your program , click on Next button. If program worked properly, you can save these compatibility settings, or you can try different settings
-- Close troubleshooter after fixing compatibility issues, or you can explore additional options by browing the web
Теги:
Windows 10
Похожие видео
Мой аккаунт