
Tuesday, 13 January, 2026г.


Где искать: по сайтам Запорожской области, статьи, видео ролики
пример: покупка автомобиля в Запорожье
Half-Life 2 - 02 - "A Red Letter Day" [Hard] (Full Playthrough)
![Half-Life 2 - 02 - "A Red Letter Day" [Hard] (Full Playthrough)](https://pic.portall.zp.ua/mq/2/15/c64bSXWM0ybD69.jpg) У вашего броузера проблема в совместимости с HTML5
У вашего броузера проблема в совместимости с HTML5
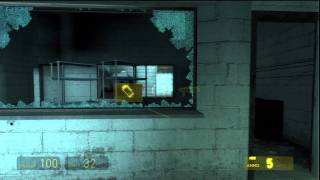
Chapter 2: "A Red Letter Day"
After his harrowing escape from City 17's Civil Protection with the help of Alyx, Gordon is lead to a secret lab behind the trainstation where he reunites with fellow Black Mesa survivors Barney and Kleiner. The four of them then concoct a plan involving a newly resurrected teleport to send Freeman over to the lab of colleague Eli Vance, where he will be relatively safe from the Combine for the time being. However, as is usually the case with Freeman, an equipment malfunction soon puts him on the radar of much deadlier forces.
Playlist of completed chapters: https://www.youtube.com/playlist?list=PLdwkkDeGrUxkKv0XLHbjcZMeJFu_HGKkR
Notes:
- The spraypainted Lambda symbol beside the vending machine (0:29) indicates a secret stash left by the Resistance. Finding these stashes rewards players with progress in the achievement "Lambda Locator", which is awarded upon finding all 45 stashes. Kleiner's lab is the first stash in the game
- The Hazardous Environmental Mark V suit is markedly different from HL1. The sprint has a limited use, and is strangely tied to the flashlight battery power. It appears slimmer than the Mark IV, and has an added zoom function (3:28)
- The mini teleport at 5:02 can be repeatedly used and many different objects can be teleported. If the player keeps using it, it will eventually explode
- Eli Vance, first seen at 5:44, was not prominently mentioned in HL1. Valve retconned one of the generic "Eli" scientists from the first game to be the Eli Vance shown in this game. Specifically, he was the one who operated the retinal scanner for Gordon right after the Resonance Cascade
Trivia:
- Kleiner is voiced by Harry S. Robins, who also voiced the scientists in HL1
- The first headcrab in the game in encountered at 2:34, although this one in particular (Lamarr) is friendly towards the player
- Kleiner's reassurance that Lamarr is "debeaked and completely harmless" refers to the method that headcrabs use to control their victims - by latching onto their heads and burrowing their way through their skulls (2:45)
- The music that plays when Gordon suits up at 3:31 is a shortened stinger version of "Hazardous Environments", which also played in HL1 when Gordon was on the cliffside in Surface Tension
- The Citadel's alarm can be first heard at 4:00
- A picture of members of the Black Mesa Anomalous Materials team can be seen at 4:44, showing Eli, Kleiner and Gordon. The scratched out member is probably Dr. Breen
- A children's drawing for Kleiner from Alyx can be seen on the corkboard at 4:51. As Gordon was in stasis for twenty years, Alyx was a child when she drew this, and is assumed to be roughly in her twenties by HL2
- While I didn't zoom in on everything on the corkboard at 4:51, a note by Kleiner to get more watermelon for Lamarr implies that headcrabs are fond of the fruit
- The G-man's second appearance is at 5:13
- Lamarr can be seen successfully pouncing on a crow after the teleport malfunction, as seen at 8:25
- The mysterious Combine advisors are shown for the first time on Breen's monitor, at 9:01
- The Ichthyosaur , an infamous Xenian enemy from HL1, makes its only appearance in HL2 at 9:08. It is worth noting that these creatures can be spawned using the console
- The Citadel can be seen re-configuring itself after Breen informs the Combine that Freeman has arrived in City 17, with dozens of City scanners pouring out of a port near the middle (9:54)
- The area seen at 10:30 is actually the back of the trainstation that Freeman arrived at during Point Insertion
Теги:
Half Life Gordon Freeman Gman Intro Opening Scene Hard Walkthrough train combine Chapter two Red letter day civil protection cop metrocop barney kleiner lab alyx teleport eli breen malfunction sequence advisor citadel
Похожие видео

Мой аккаунт