
Monday, 19 January, 2026г.


Где искать: по сайтам Запорожской области, статьи, видео ролики
пример: покупка автомобиля в Запорожье
Getting Started with Vray 3 6 For SketchUp - START HERE IF YOU'RE A BEGINNER in Hindi
 У вашего броузера проблема в совместимости с HTML5
In this video, I introduce you to the different functions contained within Vray 3.6 for SketchUp, as well as helping you create your first rendering!
To learn Advance Vray. So, Subscribe YT Channel -- https://www.youtube.com/channel/UCTA9JItcUqqcGoITSkXa5pg/
Leave a comment below and let me know what kind of Vray tutorials you'd like to see on this channel!
=========================================
SketchUP beginner tutorial :- https://www.youtube.com/playlist?list=PLF4qKdMqlcMLQh4NPqwUWsdcqIgjzri8F
=========================================
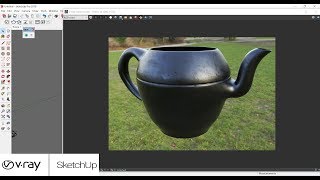
In this video, we’re going to start of using Vray by getting familiar with the interface, as well as creating our first very simple render.
My goal with these videos is to create a series of tutorials that are easy to follow to help people getting started with Vray. I think a lot of the problem with rendering is that people really try to start way too advanced, and they get confused and they quit. I’m hoping to give more of a step by step approach to Vray rendering.
To start off, when you first open Vray, you’re going to have 3 toolbars (at least in version 3.6)– you’ve got a V-Ray for SketchUp toolbar, a V-Ray lights toolbar, and a V-Ray objects toolbar.
Let’s take a look at the V-Ray for SketchUp toolbar first. This contains the tools that you’re going to use to edit your rendering, as well as the actual render buttons themselves.
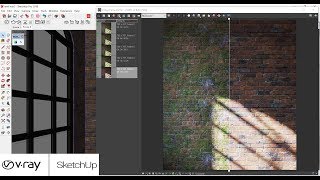
The first thing we’re going to click on is the asset editor. This is where you can adjust your material settings, your environment settings like sunlight, etc, model geometry settings, and general render settings. We’ll get into these in more depth later, but for right now, let’s focus on the first and second options, where you can edit your materials and also your lighting.
The material list section allows you to edit the different kinds of materials within your model, allowing you to adjust all the different settings for your materials. There’s two different sections in here that you can access by clicking on the arrows to the left and the right of your material. On the left, you can access V-Ray’s library of materials and presets. You can add these by either dragging them into your scene, or by right clicking and selecting add to scene.
You can then apply them to your materials within SketchUp by selecting an object, right clicking and picking apply material to selection. Note that this also gets added in as a SketchUp material that you can then apply to any face you choose. You can adjust the settings for the various materials off to the right, which we’ll discuss further in a future tutorial – this includes everything from relection/refraction settings to bump mapping and other settings.
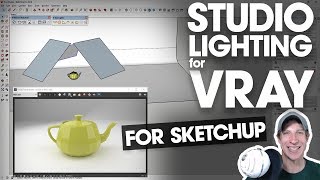
Now let’s look at the “Lights” tab. This tab contains the settings for the different lights within your model. This tab works in conjunction with the Vray lights toolbar, which allows you to add different kinds of light, like rectangle lights, sphere lights, spot lights, IES lights, and more. Once you add these to your model, you can adjust them within your lighting tab.
=========================================
:-Working on...
AutoCAD 2018 tutorial in hindi
AutoCAD 2018 learn in hindi
AutoCAD 2018 commands in hindi
AutoCAD 2018 3D tutorial in hindi
Revit Architecture 2018 tutorial in hindi
3DS Max 2018 tutorial in hindi
Vray 2018 tutorial in hindi
SketchUp tutorial in hindi
Building Estimation & Costing SketchUp tutorial in hindi
Photoshop tutorial in hindi
Illustrator tutorial in hindi
Corel Draw tutorial in hindi
Indesign tutorial in hindi
After Effect tutorial in hindi
=========================================
Whatsapp Group Link :- https://chat.whatsapp.com/invite/GOM9FL0LhClCz0NoOw9Z0U
Facebook Page Link :- https://www.facebook.com/anukoolguru/?modal=admin_todo_tour
=========================================
For Any Question Comment and Email :- [email protected]
Please Like, Share, Comment & Subscribe my channel
#online_guru
Теги:
sketchup tutorials sketchup lessons sketchup modeling sketchup 2018 architecture sketchup 2017 sketchup tutorial justin geis sketchup vray for sketchup vray for beginners vray 3.6 sketchup vray tutorial sketchup vray render sketchup vray 3.6 sketchup vray lighting tutorial sketchup vray render tutorial for beginners sketchup vray interior lighting \\\u0026 rendering tutorial vray 3.6 tutorial
Похожие видео

Мой аккаунт