Friday, 16 January, 2026г.


Где искать: по сайтам Запорожской области, статьи, видео ролики
пример: покупка автомобиля в Запорожье
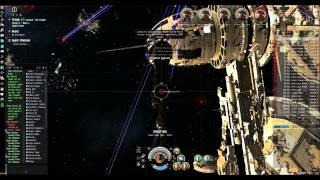
EVE Dread Pirate Scarlet, Level 4 (Tengu Solo)
"comments and tips in well-mannered statement, otherwise it will result in removal and user ban."
--------------------------------------
Faction: Angel / Blood Raider / Gurista / Serpentis
Mission type: Encounter
Space type: Normal Space - Can warp to member of fleet in any pocket directly, but cannot warp to any previous pockets directly.
Damage Dealt: All kinds
Recommended damage dealing: Explosive or Kinetic (based on random spawn) for the first pocket, Kinetic for the rest. Thermal EM do minimal damage.
Web/scramble: none
Pocket 1 (warp in)
Acceleration gate is locked and 20 KM away from warp-in.
Note: Warping out may cause a new Angel or Serpentis spawn with the same number of cruisers/battleships.
Group (Auto-aggro): (55 KM)
4 x Cruiser (Angel: Liquidator/Marauder) / (Serpentis)
5 x Battleship (Angel: Malakim/Nephilim/Warlord/) (Target Painter) / (Serpentis)
Nephiliim orbit at 31k, Malakim/warlord orbit at 7k-8k
Last battleship killed drops the key to unlock the gate. Key will not be consumed on use. The key is labeled "Gate Key".
OR
5 x Battlecruser (Serpentis: Corelatis Squad Leader/ Corelum Cheif Guard) (Damp)
4 x Battleship (Serpentis: Core Admiral/Core High Admiral)
Pocket 2
Acceleration gate is not locked and 29 KM away from warp-in.
Group (Auto-aggro): (45-60 KM)
1 x Named Battlecruiser (Anire Scarlet) Heavy EM/Thermal She warps out almost immediately
5 x Battlecruiser (Blood Raider: Arch Sage) / (Gurista: Executor)
4 x Battleship (Blood Raider: Monsignor)/ (Gurista: Exterminator) (Heavy Jamming) Jam range 100km
The Gurista battleships will do a heavy amount of jamming. Anire Scarlet is flying an Absolution and does heavy EM/Thermal damage. She will run into the next pocket if attacked or ignored for 10 minutes.
This room will clear and respawn a new group upon exiting (does not respawn every time).
With better SPs/tier, makes bounty-farming lucrative. (Read more below.) + Salvage possible.
Pocket 3
Acceleration gate is not locked and 19 KM away from warp-in.
Group 1 (Auto-aggro): (27 KM)
1 x Named Battlecruiser (Anire Scarlet) Heavy EM/Thermal
Again, Anire Scarlet does high EM/Thermal damage and runs away to the next pocket.
Group 2 (Auto-aggro): (31-33 KM)
3 x Frigate (Serpentis)
4 x Battleship (Gurista- Pith Conquistador)
OR
5 x Cruiser (Gurista: Pithum Silencer)
6 x Battleship (Serpentis: Core Port Admiral/Core Rear Admiral)
Last ship or battleship killed spawns final group. Note: Spawn group may aggro drones. Pull your drones in before triggering it.
Spawn 1 (Auto-aggro): (35 KM)
4 x Battleship (Gurista: Pith Eliminator/Pith Extinguisher) (Eliminator: Heavy Sensor Dampening)
OR
3 Battleship (Serpentis: Core Flotilla Admiral/Core Vice Admiral) (Heavy Sensor Dampening)
There's a chance that if you have a friend warp into the room after the spawn appears, the spawn will disappear and a new spawn of 6 BS and 6 cruisers will appear.
There's also a chance that this spawn Group 2 will appear if you warp out and back after killing Spawn 1, AND that it will be followed by a second Spawn 1.
If you can kill Scarlet before she warps off to the next gate and before reaching the final room, she will drop an implant.
Pocket 4
Group 1 (Auto-aggro): (55 KM)
2 x Elite Frigate (Gurista: /Dire Pithi Imputor/) (Web)
3 x Elite Cruiser (Gurista: /Dire Pithum Abolisher/Dire Pithum Annihilator) (Jamming)
4 x Battlecruiser (Gurista: Enforcer/Executor)
or there's a chance to spawn angel counterparts.
Group 2 (Auto-aggro): (70-80 KM)
1 x Named Battlecruiser (Anire Scarlet) Heavy EM/Thermal
1 x Angel Heavy Missile Battery
1 x Blood Heavy Missile Battery
1 x Guristas Cruise Missile Batteries [sic] Heavy Kinetic
1 x Serpentis Cruise Missile Battery Heavy Thermal
Group 3 (Auto-aggro): (100 KM)
4 x Battlecruiser (Serpentis: Corelatis Squad Leader/Corelatis Wing Leader)
4 x Battleship (Serpentis: Core Baron/Core Commodore)
Despite Anire Scarlet's 5 million ISK bounty and being mission completion trigger, she is no better tanked than any battlecruiser and is very easy to kill. 0-2 T1 modules in her wreck, nothing special. Last ship killed spawns next group.
Again, spawns may target drones. Keep close watch on them; they trend to go after the sentry turrets if left on auto.
Spawn 1
4 x Battleship (Serpentis: Core Port Admiral/Core Rear Admiral)
OR
4 x Battleship (Blood Raiders: Corpus Oracle/Apostle)
Last ship killed spawns next group. They spawn above Scarlet's Station, so if you're in a slow boat, keep the station in range.
There's a chance that if you have a friend warp into the room after the spawn appears, the spawn will disappear and a new spawn of multiple BS and BC will appear.
If you warp off after Spawn 1 has appeared but before Spawn 2, there's a chance that the Group 1 (Angels or Guristas) you did NOT just kill will spawn in addition to Spawn 1.
..youtube being gay, i cant list remaining strategy notes
http://eve-survival.org/wikka.php?wakka=DreadPirateScarlet4
Теги:
eve online Dread Pirate Scarlet mission eve online Dread Pirate Scarlet level 4 tengu solo Angel Cartel Blood Raider Gurista Serpentis Level solo tengu active tank video game caldari state ship tech shield tanking walkthrough playthrough gameplay guide how to Eve Online (Video Game) moochacho1 krostikgames
Похожие видео
Мой аккаунт


 У вашего броузера проблема в совместимости с HTML5


