
Friday, 02 January, 2026г.


Где искать: по сайтам Запорожской области, статьи, видео ролики
пример: покупка автомобиля в Запорожье
Configuring Authenticated Mail in WordPress with WP SMTP
 У вашего броузера проблема в совместимости с HTML5
Are you looking for a way to improve email from WordPress?
Then you'll love this video in which Anthony the WordPress Guy at Rackspace Cloud Sites shows you how to utilize this great plugin to solve all of your email issues on your WordPress site or blog (visit our WordPress page at http://www.rackspace.com/cloud/sites/web-hosting/wordpress).
Here is the text of the video along with appropriate links as you're following along.
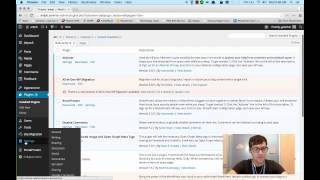
NOTE: On the video, you'll see that I have my wp-admin page opened on the left side of the screen and my directory structure on the right-hand side of the screen is the built-in Chrome development tools, so you can follow along.
Hey guys, Anthony here with another WordPress QuickTip. Today, I am going to be talking about sending authenticated mail. If you are in a shared environment or if you are running off a server, and you are utilizing the php mail function, sometimes it will not be reliable. If you want to bypass this, then the best solution is to send authenticated mail. If you send using SMTP. With this, you will be inputing the server credentials, server/host name, password, and username. This will send authenticated mail and increase success rate. I don’t recommend php mail. There is a plugin called WP SMTP. This is the plugin that will allow you to practice this solution. So let’s get started.
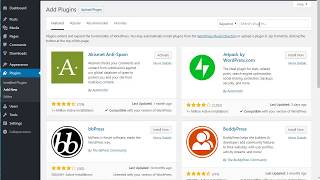
Okay, so begin in the “Add New” in plugin section. Go to search bar and search for WP SMTP. Click “install” and then “okay”. Activate plugin once it has installed.
Now, go to setting, and you will see the option for the plugin. It will request credentials from your email. Fill in as appropriate. Use the username and password same as your mail server. You can also send a test message so that it can verify that it will send authenticated. You could leave these blank and fill in the Port, Host, and username/password. Keep in mind that username will typically be your email address and the password the password to your email. Keep in mind that this will automatically use SMTP and not PHPmail, so there is no need to connect this with other plugins. This will already work automatically.
So, that’s basically it! It’s very basic, but it’s very essential. Too many people overlook the failures due to PHP mail. So if you have any issues with your mail, chances are you that you need to utilize SMTP mail.
That’s it! If you have any questions or comments, please feel free to comment below and don’t forget to subscribe. Be on the look out for the next video as I do one for every week! See you next time!
Rackspace Cloud Sites for WordPress:
http://cloudsites.rackspace.com/wordpress-drupal
Facebook Page: https://www.facebook.com/rackspacecloudsites
Google+ Page: https://plus.google.com/100139417795527694623/posts
Instagram Page: http://instagram.com/cloudsites_by_rackspace
Теги:
mail blogging wordpress WordPress (Blogger) Simple Mail Transfer Protocol (Protocol) Rackspace Rackspace (Business Operation) Cloud Sites
Похожие видео
Мой аккаунт