
Monday, 12 January, 2026г.


Где искать: по сайтам Запорожской области, статьи, видео ролики
пример: покупка автомобиля в Запорожье
3D Printing - WHAT? HOW? WHEN? WHICH? WHY?
 У вашего броузера проблема в совместимости с HTML5
www.joecage.com
Audio Description
------------------------------
The scope of this video will be just to introduce you to the concept of a 3d printer and my recommendation of what the best budget biginers printer is and why.
So if you were a part of a conversation where two people were talking about 3D printing and you had no clue of what they were on about or if you in the market looking to buy a budget 3D printer and are stumped by the absolute number of options available in the market or even if you have got your first printer and you don’t understand it, then this video is for you.
Let’s get straight to the point.
This is a 2D printer, an inject printer to be precise. It prints along the X axis and along the Y axis, those are the two dimensions, X and Y. The printer carriage moves along the X axis and the rollers help the paper move along the Y axis so that the print can be marked on any point along a sheet of paper. As you might have realized by now, every point on a sheet of paper can be marked with an (X,Y) coordinate. Say this point is (X=4,Y=6) this point could be (X=5, Y=3).
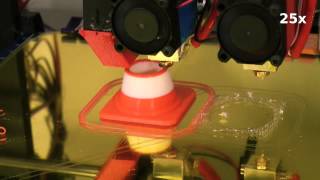
Now this, on the other hand is a 3d printer, a FDM or fused deposition modeling 3d printer to be precise. this is a little different from the 2D printer because it allows a 3rd dimension. Along with X and Y, there is a Z coordinate to mark every point along the print. What this allows you to do is, marking a coordinate will not need to be limited on a sheet of paper, but it can be in the free space. Here, this point will be (X=4,Y=6,Z=0) and this point would be (X=4,Y=6,Z=5). Any point on the printing workspace can be marked by their X,Y and Z coordinates. Thats it, its as simple as that.
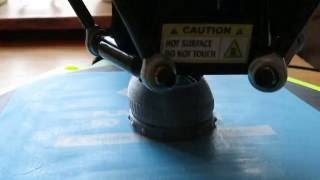
Let’s get into some basics of how this printer works. This is a filament, usually made of a type of plastic, the filament is melted and laid layer over layer by the extruder. The extruder has a hot end that does the melting bit, this bit here. then it has gears inside that are connected to motors, to make sure there is a flow of filament when needed and also makes sure there is no flow of filament when the flow is not needed. It has a temperature sensor to monitor the temperature of the hot end and it has these two motors driving this timing belt to help the extruder move along the X axis. The stepper motors are very presice and can point to any spot of the X axis with an accuracy of 1/3rd of a millimeter. These are cooling fans that help solidify the molten plastic once it has been extruded on the printing surface.
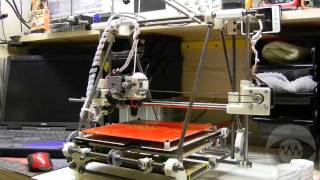
This entire set up of the extruder, fans and its DC motors are mounted on the Z carriage that helps it move along Z axis. Instead of using belts, here we have screw type threaded rods connected to the stepper motors to help move the extruder setup along the Z Axis. finally, this is the build plate, it has motors on the inside to help move the build plate along the Y axis. The printing bed has the ability to be heated like the extruder set up, as it is important the print sticks and holds steady to the plate for the duration of the print, but we will get to the details of that in a minute. There are switches along all three axis to maintain the end limits. for instance, this printer has a printing area of 200X200X180. Which means it can print objects with a 20cm length, 20cm width and a 18cm height. There is a touch screen to operate the printer, a SD card reader so that you can transfer files that you wish to print from your computer. there is also a fire wire to usb cable if you want to have a direct interface with your computer. I would not recommend using this though, because if your computer crashed or restarted during the duration of the print, your print would fail. and the duration of the print is usually quite long. Use the SD card, it is easier. And here will have the filament spool holder. The printer originally came with a smaller spool holder, because spools have got larger in the recent past, this 1KG spool does not fit in the stock holder, so i got one printed for this purpose and it works great. That’s what’s great about 3d printers, you don’t have to buy parts, you can just print them.
Теги:
joecage 3d printer 3d printing basics what? how? which? when? why? extruder axis dimentiones dimensions wanhao prusa i3 FDM printer everything
Похожие видео
Мой аккаунт